
Unlock 353 Bricks layouts and components with a subscription
Event Single 01
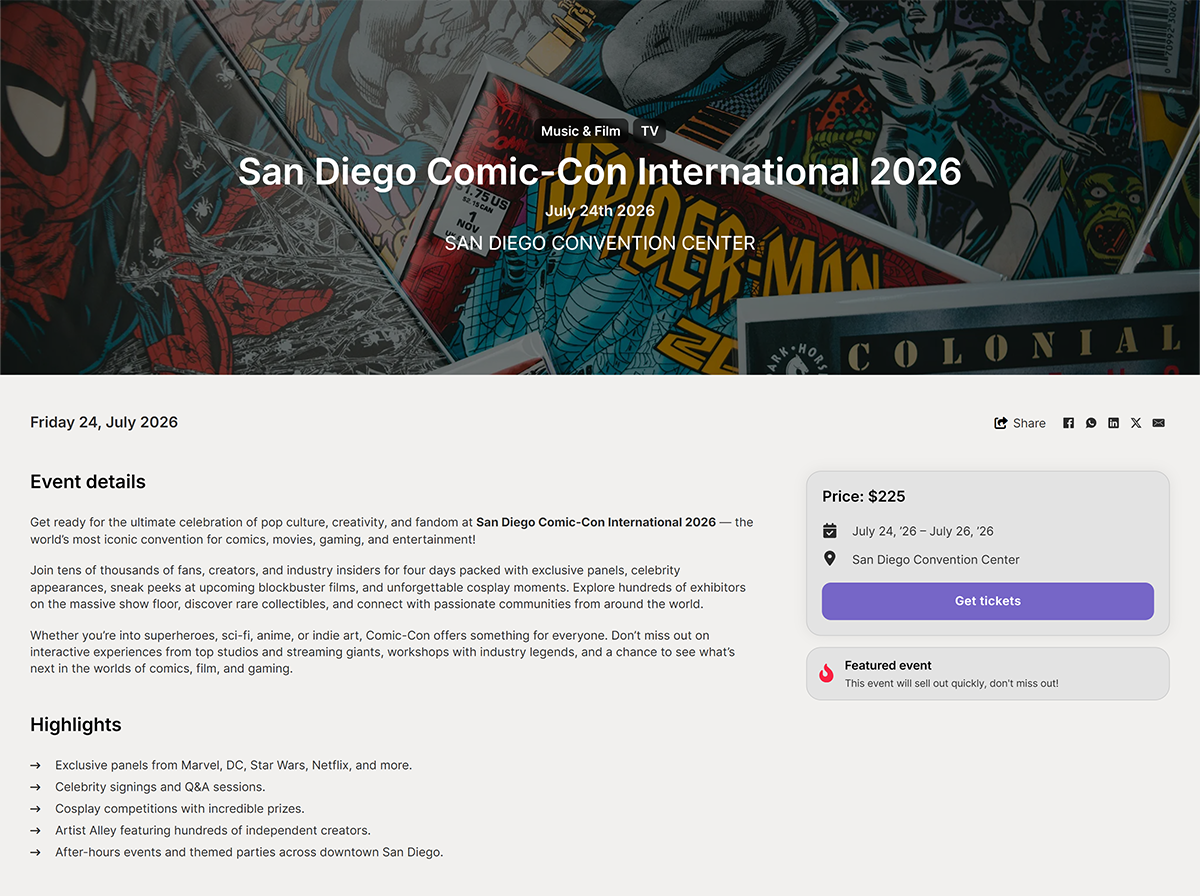
Details
Edit block name class
Plugins required
Layout instructions
To make your Event Single Layout work dynamically, you’ll need to import the included ACF (Advanced Custom Fields) export file before using the layout.
This ensures that all event-related data — including dates, venues, speakers, and schedules — is correctly connected to the Bricks dynamic data bindings and element conditions built into the layout.
1. Import the ACF Field Groups
-
Log in to your WordPress dashboard.
-
Go to Custom Fields → Tools.
-
Under Import Field Groups, click Choose File and select the JSON file you downloaded:
event-single-1-acf-export.json -
Click Import File.
-
You’ll now see new field groups appear in your ACF list:
-
Event Fields (for the “Event” post type)
-
Speaker Fields (for the “Speaker” post type)
-
Venue Fields (for the “Venue” post type)
-
Event Categories and Event Tags taxonomies
-
2. Custom Post Types Created
Importing the file automatically registers the following post types:
-
🗓 Events (
event) -
🎤 Speakers (
speaker) -
📍 Venues (
venue)
Each post type has its own custom fields and bi-directional relationships — for example, adding speakers to an event automatically links those speakers back to that event.
3. How Dynamic Data Works in the Layout
Once imported, all Bricks elements in the Event Single layout will pull content dynamically from these ACF fields.
You don’t need to edit the layout itself — just fill in your fields, and the design updates automatically.
For example:
-
The event date, time, and price are automatically shown if entered.
-
If “Free Event” is toggled on, the Price field (and related layout elements) will automatically hide.
-
If “Event Has Schedule” is enabled, the layout will reveal a schedule section.
-
If “Multi-day Schedule” is selected, a multi-day version of the schedule appears instead.
-
Adding a Venue or Speakers will dynamically display those sections — otherwise they remain hidden.
These show/hide behaviors use Bricks Element Conditions, meaning you can leave fields empty and the layout will adapt automatically.
4. Creating Content
To add a new event:
-
Go to Events → Add New.
-
Enter your event title and featured image.
-
Fill in the fields under the Event group:
-
Description, Highlights, Start/End Time, Price or Free Event toggle
-
“Event Has Schedule?” toggle and repeater for your event sessions
-
Add Venue and Speakers using the relationship fields
-
To add a venue:
-
Go to Venues → Add New.
-
Add the venue name, description, address, and optional map coordinates.
-
When linked to an event, it will display automatically in the Event layout.
To add a speaker:
-
Go to Speakers → Add New.
-
Add name, bio, position, and optional website.
-
Assign them to an event using the “Event Speakers” relationship field.
5. Categories & Tags
You can organize your events using:
-
Event Categories (e.g., Conventions, Festivals, Tech Events)
-
Event Tags (e.g., AI, Comics, Design, Live Show)
These can be used for filtering or archive templates if you create listings.
6. Recommended:
-
Use ACF Pro (or Advanced Custom Fields 6.0+) to ensure repeater fields and relationships function correctly.
-
Make sure Bricks’ Dynamic Data feature is enabled in settings.
-
Do not rename the fields in ACF — they’re directly bound to the layout’s dynamic tags.
That’s it!
Once imported and populated, your Event Single layout will automatically display the right sections based on what you enter — making it fully dynamic and ready to customize further in Bricks.