Pixflow layouts and components are designed to be used directly inside Bricks Builder, producing native, editable Bricks elements with no exports, ZIP files, or proprietary wrappers.
This document explains:
The two supported ways to use Pixflow assets
How framework choice affects copying
What is and is not supported
When Pixflow framework styles are required
Two Supported Ways to Use Pixflow Assets
Pixflow layouts and components can be used in two intentional and supported workflows:
1. Remote Templates (Bricks Builder)
Paid plans · Whitelisted domains · Pixflow framework only
2. Copy & Paste from the Pixflow Website
Free & paid plans · Framework mapping supported
Both workflows insert native Bricks elements, but they behave differently and support different framework strategies.
Workflow A: Using Pixflow via Remote Templates (Paid Plans)
Remote Templates allow you to browse and insert Pixflow layouts and components directly inside Bricks Builder.
Requirements
All of the following must be true:
You are on a paid Pixflow plan
You are using Bricks Builder
Each site domain is whitelisted in your Pixflow dashboard
Pixflow framework styles are installed
⚠️ Remote Templates always use the Pixflow framework Framework mapping is not supported for remote templates.
If Pixflow styles are not installed, imported layouts will be missing variables, classes, and design tokens.
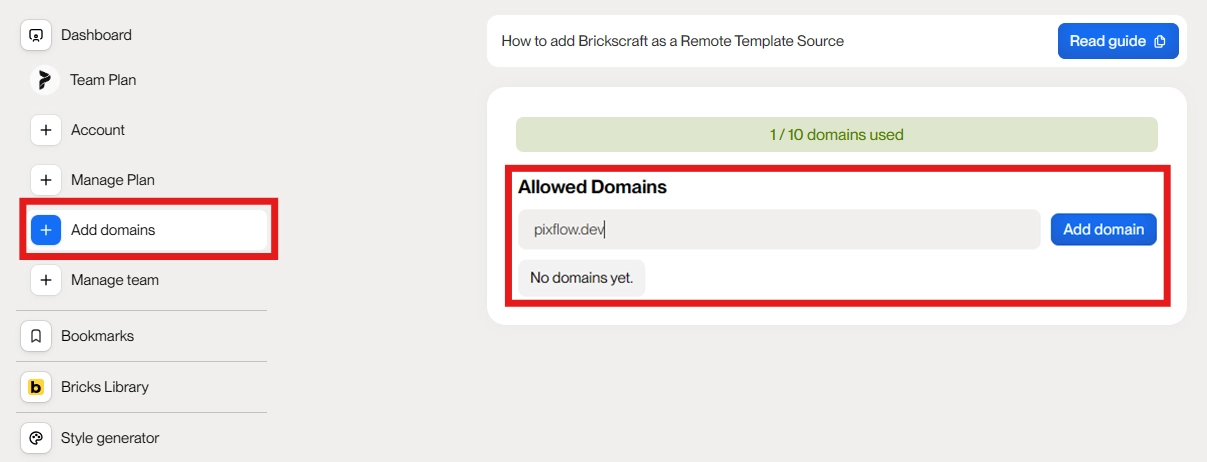
Step 1: Whitelist Your Site Domain
(Pixflow Dashboard)
Log in to your Pixflow account
Go to Dashboard → Domains
Enter the domain of each Bricks site
Do not include http:// or https://
Subdomains are allowed but count separately
Click Save
Once saved:
The domain is authorised
Remote Templates become available on that site
Access is enforced based on your plan limits
Step 2: Add Pixflow as a Remote Template Source
(Bricks Builder)
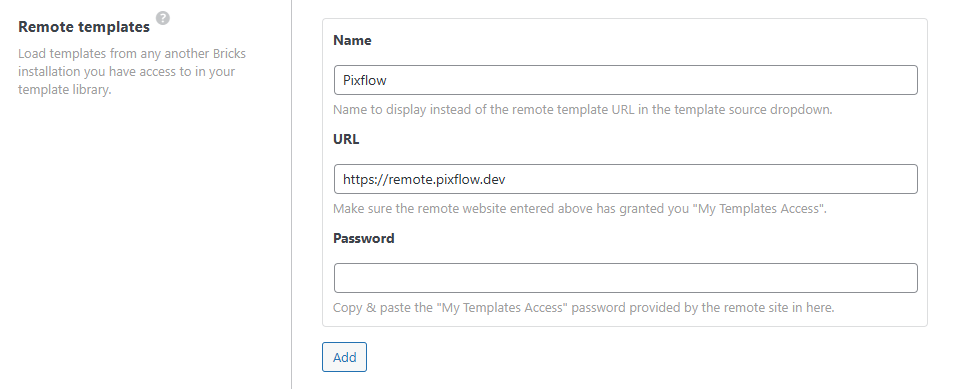
In WordPress admin, go to Bricks → Settings → Templates
Scroll to Remote Templates
Add:
Name: Pixflow
URL:https://remote.pixflow.dev
Password: leave blank
Click Save Changes
Important: The URL must use https, not http.
Pixflow will now appear as a selectable source inside Bricks.
Step 3: Browsing & Importing Templates in Bricks
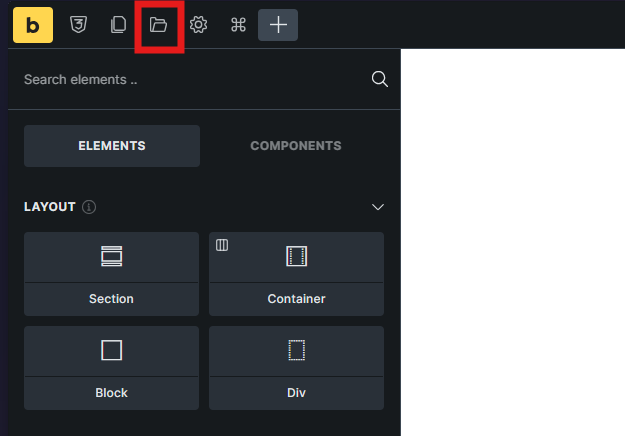
Open Bricks Builder
Open the Templates panel
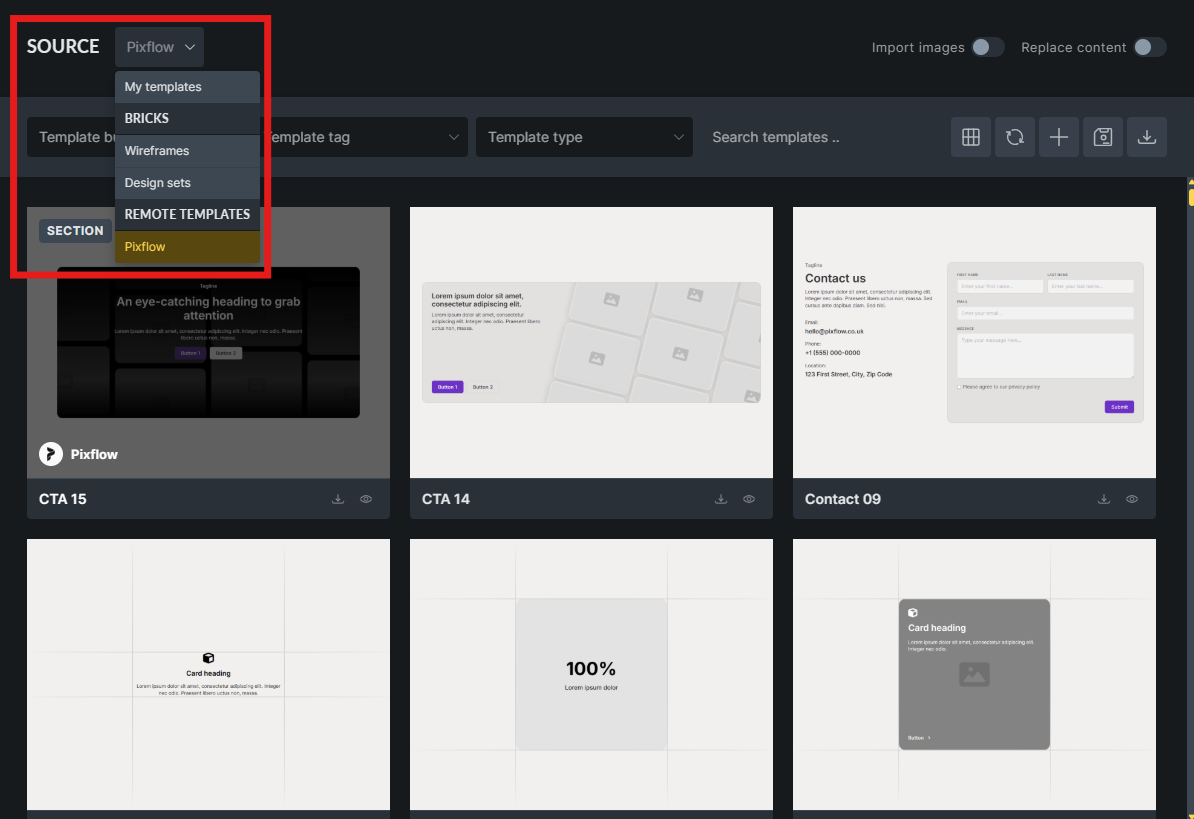
Select Pixflow from the Remote Templates source dropdown
Browse layouts and components
Insert directly into the page
Imported assets are:
Native Bricks elements
Fully editable
Not locked or encoded
Independent after insertion
Not synced after import
Workflow B: Copying from the Pixflow Website
(Free & Paid Plans)
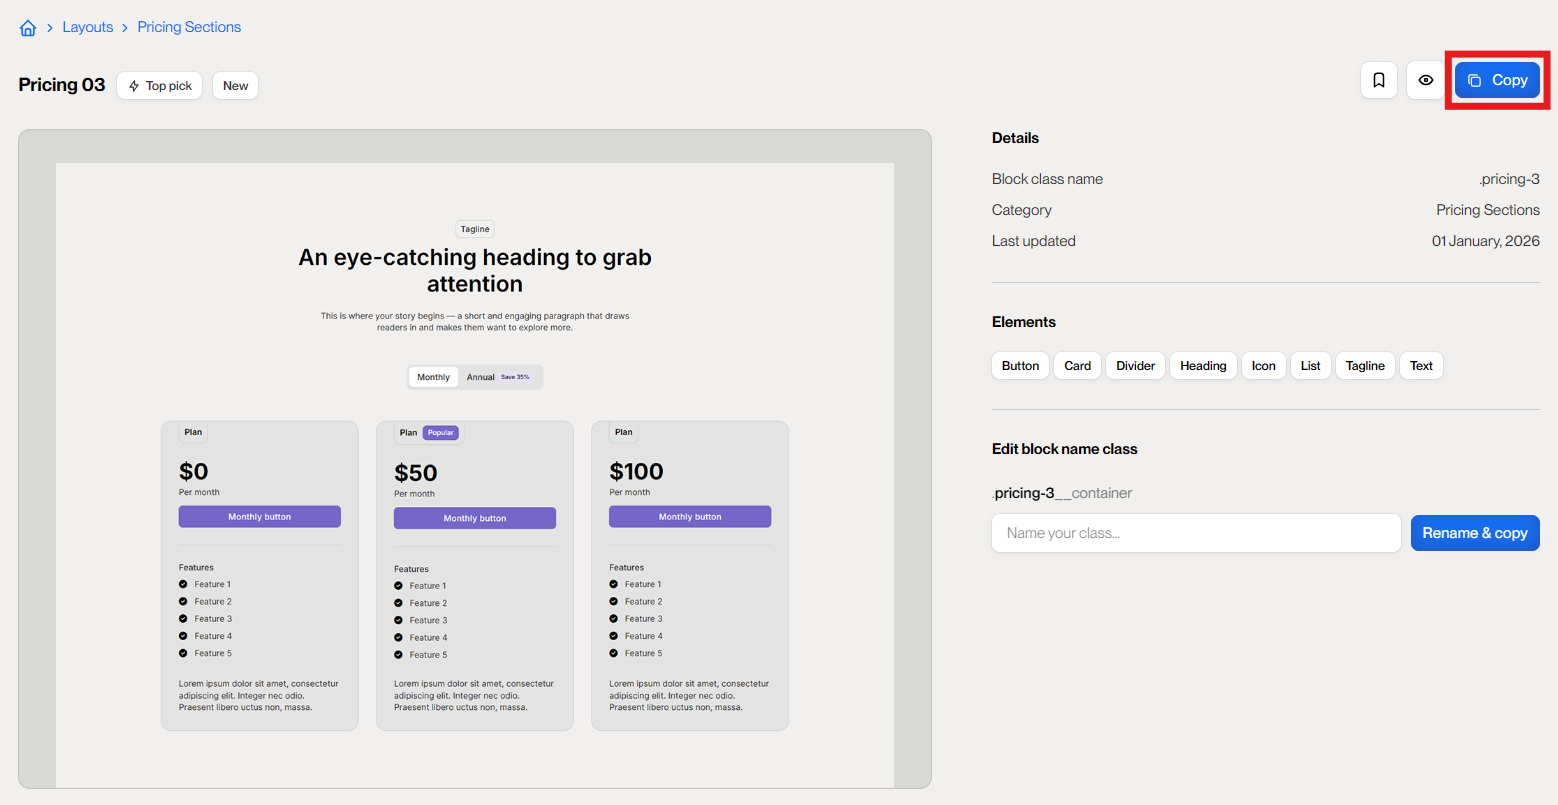
Pixflow also supports copying layouts and components from the website and pasting them into Bricks Builder.
This workflow:
Does not require Remote Templates
Works for free and paid users (with feature limits)
Supports framework mapping
Is ideal for testing, experimentation, and flexible reuse
Framework Choice When Copying
When copying from the Pixflow website, you can choose how variables are handled before copying.
Available options include:
Pixflow Framework Uses Pixflow’s native variables → Requires Pixflow framework styles to be installed
Framework Mapping Rewrites variables at copy time to match:
ACSS
Advanced Themer
Core Framework
Raw CSS
→ Does not require Pixflow framework styles
⚠️ Framework mapping applies only to copy & paste Remote Templates always use the Pixflow framework.
The selected framework affects only the copied output, not Pixflow’s stored layouts.
Copy Methods Explained
Pixflow provides two copy methods, each with a specific purpose.
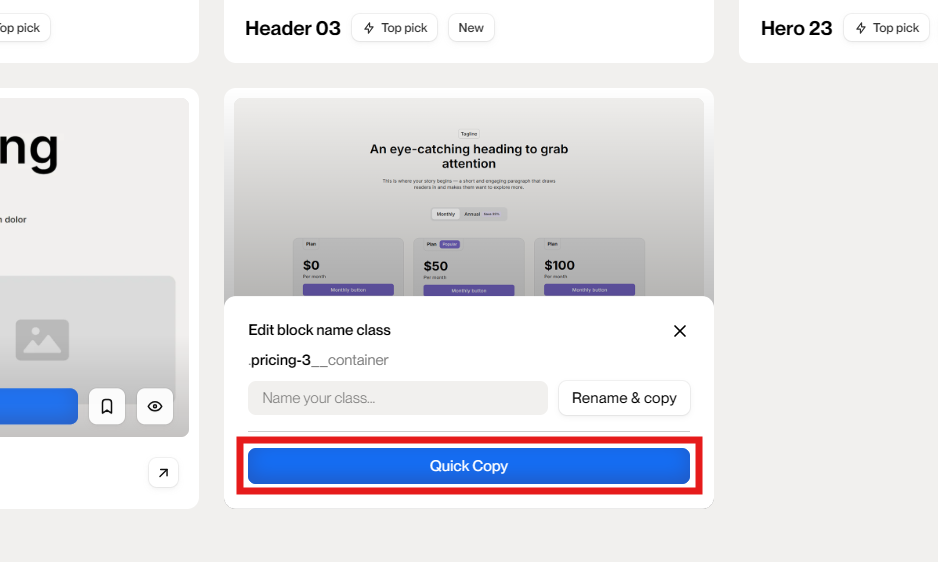
Quick Copy
Available to:
Free users (free items only)
All paid users
What it does:
Copies the layout or component exactly as-is
Preserves the default BEM class structure
Example:
.content-1
.content-1__container
.content-1__img
Best for:
Fast reuse
Minimal customisation
Dropping layouts into existing pages
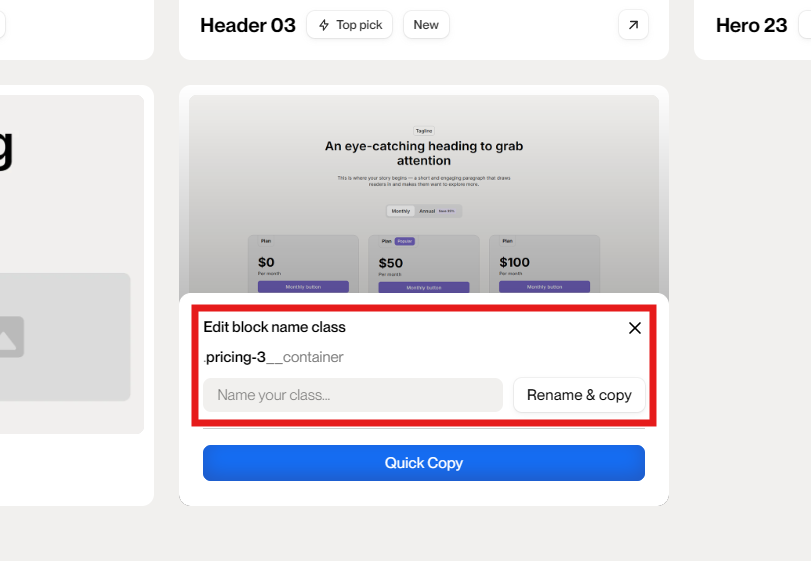
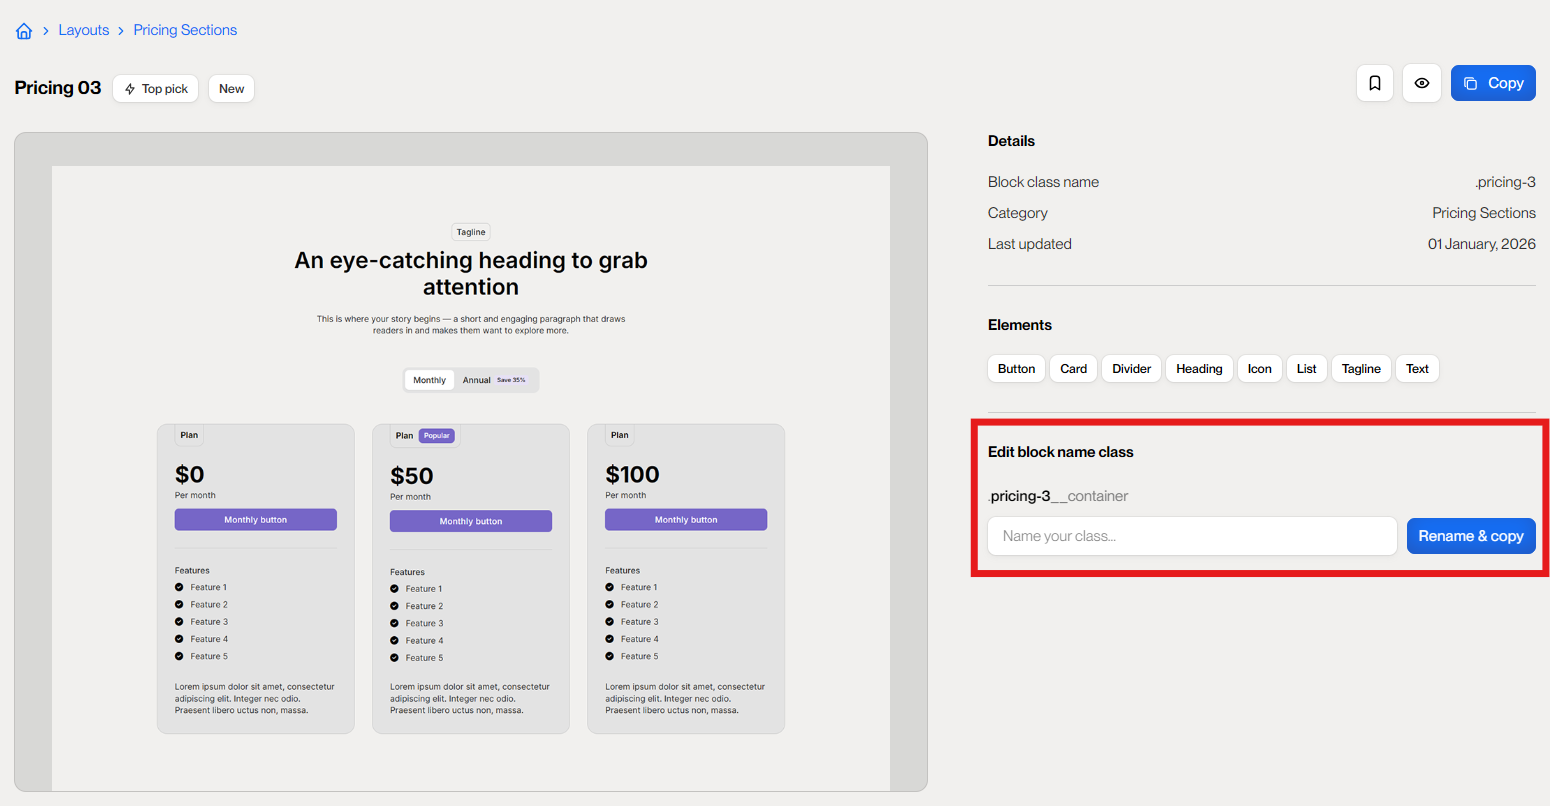
Rename & Copy
(Paid Plans Only)
What it does:
Copies the layout or component
Renames the entire BEM block to a user-defined class
Copy & Paste Flexible usage with optional framework mapping
Choose the workflow and framework strategy that fits your project — Pixflow adapts at the point of use.
Hidden
Contents
By clicking “Accept Cookies”, you agree to the storing of cookies on your device to enhance site navigation,
analyze site usage, and assist in our marketing efforts.
View our
Cookie Policy
for more information.
Cookie Settings
We use cookies to offer you a better experience. See
Cookie Policy
for more details.
Manage Preferences
Essential
Essential for the site to function. Always on.
Personalization
Used to remember preference selections and provide enhanced features.
Marketing
Used for targeted advertising.
Analytics
Used to measure usage and improve your experience.